741 lines
28 KiB
Markdown
741 lines
28 KiB
Markdown
# OpenShfit 설치 방법
|
||
|
||
테스트 환경
|
||
|
||
1. 최신 버전 OpenShift 4.12 기준으로 진행
|
||
2. OpenShift에서 요구하는 최소 권장 사양 (bastion 서버 제외)
|
||
3. worker 서버는 cmoa도 추후 설치 테스트를 해야 함으로 ( ) 에 적은 사양으로 진행
|
||
4. bootstrap 서버와 master 서버 같은 경우 RHCOS 만 지원
|
||
|
||
[DownLoad(openshift.com)](https://mirror.openshift.com/pub/openshift-v4/dependencies/rhcos/)
|
||
|
||
1. worker 서버 같은 경우 RHCOS, RHEL 8.4 / 8.5 만 지원
|
||
2. bastion 서버의 OS는 자유롭게 선택 가능 편의를 위해 CentOS Steam 8 사용
|
||
|
||
[Download (centos.org)](https://centos.org/download/)
|
||
|
||
|
||
|
||
| HostName | IP | OS | CPU | RAM | Disk |
|
||
| ---| ---| ---| ---| ---| --- |
|
||
| [bastion.exem.sysdocu.kr](http://bastion.exem.sysdocu.kr) | 10.10.43.227 | CentOS Stream 8 | 2 | 4 | 50 |
|
||
| [bootstrap.exem.sysdocu.kr](http://bootstrap.exem.sysdocu.kr) | 10.10.43.231 | RHCOS 4.12.0 | 4 | 16 | 100 |
|
||
| [master01.exem.sysdocu.kr](http://master01.exem.sysdocu.kr) | 10.10.43.232 | RHCOS 4.12.0 | 4 | 16 | 100 |
|
||
| [master02.exem.sysdocu.kr](http://master02.exem.sysdocu.kr) | 10.10.43.233 | RHCOS 4.12.0 | 4 | 16 | 100 |
|
||
| [master03.exem.sysdocu.kr](http://master03.exem.sysdocu.kr) | 10.10.43.234 | RHCOS 4.12.0 | 4 | 16 | 100 |
|
||
| [worker01.exem.sysdocu.kr](http://worker01.exem.sysdocu.kr) | 10.10.43.237 | RHCOS 4.12.0 | 2(10) | 8(16) | 100(300) |
|
||
| [worker02.exem.sysdocu.kr](http://worker02.exem.sysdocu.kr) | 10.10.43.238 | RHCOS 4.12.0 | 2(10) | 8(16) | 100(300) |
|
||
|
||
|
||
|
||
설치 순서 요약
|
||
|
||
1. DNS 서버 설정
|
||
* OKD를 사용하기 위해서는 내부 DNS가 필요함
|
||
2. HTTP 파일 서버 설정
|
||
* OKD 설치에 사용되는 ignition 파일과 hash값 입력을 위한 용도
|
||
3. LoadBalancer 설정
|
||
* LB 구성을 위해 haproxy 설치 및 설정 필요
|
||
4. OpenShift Installer 설치
|
||
* OpenShift 설치에 필요한 Installer 설치 및 필요 파일 생성
|
||
* ※ Redhat 계정 필요 ※
|
||
5. bootstrap 노드 설치
|
||
* OKD Cluster 구성에 이용되는 노드 (마스터 노드 구성 이후 사용하지 않음)
|
||
6. master 노드 설치
|
||
7. worker 노드 설치
|
||
|
||
|
||
|
||
설치 방법
|
||
|
||
### 1\. DNS 서버 설정 (bastion 서버)
|
||
|
||
|
||
|
||
> 패키지 업데이트 및 업그레이드
|
||
|
||
```bash
|
||
[root@bastion ~]# yum update && upgrade
|
||
```
|
||
|
||
|
||
|
||
> SELinux 비활성화 설정 및 적용
|
||
|
||
\[root@bastion ~\]# vi /etc/selinux/config
|
||
|
||
```bash
|
||
[root@bastion ~]# vi /etc/selinux/config
|
||
|
||
SELINUX=disabled # disabled로 변경
|
||
|
||
[root@bastion ~]# setenforce 0
|
||
```
|
||
|
||
|
||
|
||
> bind 패키지 설치
|
||
|
||
|
||
|
||
```bash
|
||
[root@bastion ~]# yum -y install bind bind-utils
|
||
```
|
||
|
||
|
||
|
||
> 정방향, 역방향 zone 설정
|
||
|
||
```bash
|
||
# 정방향 설정
|
||
[root@bastion ~]# vi /var/named/sysdocu.kr.zone
|
||
|
||
$TTL 60
|
||
@ IN SOA bastion.exem.sysdocu.kr. root (
|
||
2023012001 ; serial
|
||
1D ; refresh
|
||
1H ; retry
|
||
1W ; expire
|
||
3H ) ; minimum
|
||
|
||
IN NS bastion.exem.sysdocu.kr.
|
||
|
||
exem IN A 10.10.43.227
|
||
ocp.exem IN A 10.10.43.227
|
||
helper.exem IN A 10.10.43.227
|
||
api.exem IN A 10.10.43.227
|
||
api-int.exem IN A 10.10.43.227
|
||
*.exem IN A 10.10.43.227
|
||
|
||
bootstrap.exem IN A 10.10.43.231
|
||
|
||
master01.exem IN A 10.10.43.232
|
||
master02.exem IN A 10.10.43.233
|
||
master03.exem IN A 10.10.43.234
|
||
|
||
worker0.exem IN A 10.10.43.237
|
||
worker1.exem IN A 10.10.43.238
|
||
```
|
||
|
||
|
||
|
||
```bash
|
||
# 역방향 설정
|
||
[root@bastion ~]# vi /var/named/43.10.10.rev.zone
|
||
|
||
$TTL 1W
|
||
@ IN SOA bastion.exem.sysdocu.kr. root (
|
||
2019070700 ; serial
|
||
3H ; refresh (3 hours)
|
||
30M ; retry (30 minutes)
|
||
2W ; expiry (2 weeks)
|
||
1W ) ; minimum (1 week)
|
||
IN NS bastion.exem.sysdocu.kr.
|
||
;
|
||
227.43.10.10.in-addr.arpa. IN PTR api.exem.sysdocu.kr.
|
||
227.43.10.10.in-addr.arpa. IN PTR api-int.exem.sysdocu.kr.
|
||
;
|
||
231.43.10.10.in-addr.arpa. IN PTR bootstrap.exem.sysdocu.kr.
|
||
;
|
||
232.43.10.10.in-addr.arpa. IN PTR master01.exem.sysdocu.kr.
|
||
233.43.10.10.in-addr.arpa. IN PTR master02.exem.sysdocu.kr.
|
||
234.43.10.10.in-addr.arpa. IN PTR master03.exem.sysdocu.kr.
|
||
;
|
||
237.43.10.10.in-addr.arpa. IN PTR worker01.exem.sysdocu.kr.
|
||
238.43.10.10.in-addr.arpa. IN PTR worker02.exem.sysdocu.kr.
|
||
;
|
||
;EOF
|
||
|
||
# 역방향 설정에 적어둔 네임으로 각 서버들의 호스트명이 자동으로 설정됨
|
||
```
|
||
|
||
|
||
|
||
> 설정한 zone 파일 연결
|
||
|
||
```bash
|
||
[root@bastion ~]# vi /etc/named.conf
|
||
|
||
options {
|
||
listen-on port 53 { any; }; # 해당 부분 any로 변경
|
||
listen-on-v6 port 53 { ::1; };
|
||
directory "/var/named";
|
||
dump-file "/var/named/data/cache_dump.db";
|
||
statistics-file "/var/named/data/named_stats.txt";
|
||
memstatistics-file "/var/named/data/named_mem_stats.txt";
|
||
recursing-file "/var/named/data/named.recursing";
|
||
secroots-file "/var/named/data/named.secroots";
|
||
allow-query { any; }; # 해당 부분 any로 변경
|
||
|
||
recursion yes;
|
||
|
||
forwarders { 164.124.101.2; }; # 꼭 필요한 설정은 아닌거 같음
|
||
|
||
dnssec-enable yes;
|
||
dnssec-validation yes;
|
||
|
||
bindkeys-file "/etc/named.root.key";
|
||
|
||
managed-keys-directory "/var/named/dynamic";
|
||
|
||
pid-file "/run/named/named.pid";
|
||
session-keyfile "/run/named/session.key";
|
||
};
|
||
|
||
[root@bastion ~]# vi /etc/named.rfc1912.zones
|
||
|
||
zone "sysdocu.kr" IN {
|
||
type master;
|
||
file "sysdocu.kr.zone";
|
||
allow-update { none; };
|
||
};
|
||
|
||
zone "43.10.10.in-addr.arpa" IN {
|
||
type master;
|
||
file "43.10.10.rev.zone";
|
||
allow-update { none; };
|
||
};
|
||
|
||
[root@bastion ~]# systemctl enable named
|
||
[root@bastion ~]# systemctl start named
|
||
|
||
[root@bastion ~]# nslookup bootstrap.exem.sysdocu.kr localhost
|
||
Server: localhost
|
||
Address: ::1#53
|
||
|
||
Name: bootstrap.exem.sysdocu.kr
|
||
Address: 10.10.43.231
|
||
|
||
[root@bastion ~]# nslookup 10.10.43.227 localhost
|
||
227.43.10.10.in-addr.arpa name = api.exem.sysdocu.kr.
|
||
227.43.10.10.in-addr.arpa name = api-int.exem.sysdocu.kr.
|
||
```
|
||
|
||
|
||
|
||
> DNS 변경 (bastion 서버 포함 모든 서버)
|
||
|
||
```bash
|
||
[root@bastion ~]# vi /etc/resolv.conf
|
||
# Generated by NetworkManager
|
||
search exem.sysdocu.kr
|
||
nameserver 10.10.43.227
|
||
nameserver 8.8.8.8 # 필수 아님 bastion 서버에만 설정
|
||
```
|
||
|
||
|
||
|
||
### 2\. HTTP 파일 서버 설정 (bastion 서버)
|
||
|
||
|
||
|
||
> nginx 설치
|
||
|
||
```bash
|
||
[root@bastion ~]# vi /etc/yum.repos.d/nginx.repo
|
||
|
||
[nginx]
|
||
name=nginx repo
|
||
baseurl=http://nginx.org/packages/centos/8/$basearch/
|
||
gpgcheck=0
|
||
enabled=1
|
||
|
||
# bastion 서버 OS에 맞게 repo 추가
|
||
# 해당 문서는 CentOS Strea 8 기준
|
||
|
||
[root@bastion ~]# yum -y install nginx
|
||
[root@bastion ~]# systemctl start nginx
|
||
```
|
||
|
||
|
||
|
||
> nginx 설정
|
||
|
||
```bash
|
||
[root@bastion ~]# vi /etc/nginx/nginx.conf
|
||
|
||
server {
|
||
listen 8080 default_server; # 해당 부분의 포트를 8080 으로 변경 (1)
|
||
listen [::]:8080 default_server; # 해당 부분의 포트를 8080 으로 변경
|
||
server_name _;
|
||
root /usr/share/nginx/html;
|
||
|
||
# Load configuration files for the default server block.
|
||
include /etc/nginx/default.d/*.conf;
|
||
|
||
location / { # 해당 부분의 3줄 추가 (2)
|
||
root /usr/share/nginx/html/files;
|
||
index index.html index.htm;
|
||
autoindex on;
|
||
}
|
||
|
||
error_page 404 /404.html;
|
||
location = /40x.html {
|
||
}
|
||
|
||
error_page 500 502 503 504 /50x.html;
|
||
location = /50x.html {
|
||
}
|
||
}
|
||
|
||
# (1) haproxy와 port 중복을 방지하기 위해 port를 80 -> 8080 으로 변경
|
||
# (2) OKD 설치시 필요한 파일을 보다 원할하게 공유하기 위해 파일 서버용 디렉토리 생성 및 설정
|
||
# 꼭 nginx를 사용하지 않고 apache등 사용해도 무관
|
||
|
||
[root@bastion ~]# mkdir /usr/share/nginx/html/files
|
||
[root@bastion ~]# systemctl reload nginx
|
||
[root@bastion ~]# systemctl stop firewalld
|
||
|
||
# 디렉토리 생성, nginx에 설정 반영, 방화벽 종료
|
||
# 웹 브라우저를 통해 http://10.10.43.227:8080 (bastion 서버 ip) 접속하여 정상 동작 확인
|
||
```
|
||
|
||
|
||
|
||
### 3\. LoadBalancer 설정 (bastion 서버)
|
||
|
||
|
||
|
||
> haproxy 설치 및 설정
|
||
|
||
```bash
|
||
[root@bastion ~]# yum -y install haproxy
|
||
[root@bastion ~]# cp -arp /etc/haproxy/haproxy.cfg /etc/haproxy/haproxy.cfg.bak # (1)
|
||
[root@bastion ~]# vi /etc/haproxy/haproxy.cfg
|
||
|
||
global
|
||
log 127.0.0.1 local2
|
||
pidfile /var/run/haproxy.pid
|
||
maxconn 4000
|
||
daemon
|
||
|
||
defaults
|
||
mode http
|
||
log global
|
||
option dontlognull
|
||
option http-server-close
|
||
option redispatch
|
||
retries 3
|
||
timeout http-request 10s
|
||
timeout queue 1m
|
||
timeout connect 10s
|
||
timeout client 1m
|
||
timeout server 1m
|
||
timeout http-keep-alive 10s
|
||
timeout check 10s
|
||
maxconn 3000
|
||
|
||
frontend stats
|
||
bind *:1936
|
||
mode http
|
||
log global
|
||
maxconn 10
|
||
stats enable
|
||
stats hide-version
|
||
stats refresh 30s
|
||
stats show-node
|
||
stats show-desc Stats for exem cluster
|
||
stats auth admin:exem@ # (2)
|
||
stats uri /stats
|
||
|
||
# (3)
|
||
listen api-server-6443
|
||
bind *:6443
|
||
mode tcp
|
||
server bootstrap bootstrap.exem.sysdocu.kr:6443 check inter 1s backup
|
||
server master01 master01.exem.sysdocu.kr:6443 check inter 1s
|
||
server master02 master02.exem.sysdocu.kr:6443 check inter 1s
|
||
server master03 master03.exem.sysdocu.kr:6443 check inter 1s
|
||
|
||
listen machine-config-server-22623
|
||
bind *:22623
|
||
mode tcp
|
||
server bootstrap bootstrap.exem.sysdocu.kr:22623 check inter 1s backup
|
||
server master01 master01.exem.sysdocu.kr:22623 check inter 1s
|
||
server master02 master02.exem.sysdocu.kr:22623 check inter 1s
|
||
server master03 master03.exem.sysdocu.kr:22623 check inter 1s
|
||
|
||
listen ingress-router-443
|
||
bind *:443
|
||
mode tcp
|
||
balance source
|
||
server worker01 worker0.exem.sysdocu.kr:443 check inter 1s
|
||
server worker02 worker1.exem.sysdocu.kr:443 check inter 1s
|
||
|
||
listen ingress-router-80
|
||
bind *:80
|
||
mode tcp
|
||
balance source
|
||
server worker01 worker0.exem.sysdocu.kr:80 check inter 1s
|
||
server worker02 worker1.exem.sysdocu.kr:80 check inter 1s
|
||
|
||
[root@bastion ~]# systemctl enable haproxy
|
||
[root@bastion ~]# systemctl enable haproxy
|
||
|
||
# (1) 작업 전 원복 백업
|
||
# (2) haproxy 로그인 설정 부분 아이디:패스워드
|
||
# (3) proxy 설정
|
||
# http://10.10.43.227:1936/stats 접속하여 동작 확인
|
||
# (bastion 서버의 ip 및 위에서 설정한 아이디와 패스워드)
|
||
```
|
||
|
||
|
||
|
||
### 4\. OpenShift Installer 설치 (bastion 서버)
|
||
|
||
|
||
|
||
> OpenShift Installer 설치
|
||
|
||
```bash
|
||
# OpneShift Installer 설치
|
||
[root@bastion ~]# yum -y install wget # wget이 없을 경우 설치
|
||
[root@bastion ~]# wget https://mirror.openshift.com/pub/openshift-v4/clients/ocp/4.12.0/openshift-install-linux-4.12.0.tar.gz # (1)
|
||
[root@bastion ~]# tar -xvzf openshift-install-linux-4.12.0.tar.gz
|
||
[root@bastion ~]# ./openshift-install version
|
||
./openshift-install 4.12.0
|
||
built from commit ba940311c8cb2a07173725e5c2f668df7c61924c
|
||
release image quay.io/openshift-release-dev/ocp-release@sha256:4c5a7e26d707780be6466ddc9591865beb2e3baa5556432d23e8d57966a2dd18
|
||
release architecture amd64
|
||
|
||
# oc client 설치
|
||
[root@bastion ~]# wget https://mirror.openshift.com/pub/openshift-v4/clients/ocp/4.12.0/openshift-client-linux-4.12.0.tar.gz # (1)
|
||
[root@bastion ~]# tar -xvzf openshift-client-linux-4.12.0.tar.gz
|
||
[root@bastion ~]# mv oc kubectl /usr/local/bin/
|
||
[root@bastion ~]# oc version
|
||
Client Version: 4.12.0
|
||
Kustomize Version: v4.5.7
|
||
Server Version: 4.12.0
|
||
Kubernetes Version: v1.25.4+77bec7a
|
||
[root@bastion ~]# kubectl version
|
||
WARNING: This version information is deprecated and will be replaced with the output from kubectl version --short. Use --output=yaml|json to get the full version.
|
||
Client Version: version.Info{Major:"1", Minor:"24", GitVersion:"v1.24.1", GitCommit:"854f807d8a84dde710c062a5281bca5bc07cb562", GitTreeState:"clean", BuildDate:"2023-01-05T01:27:27Z", GoVersion:"go1.19.4", Compiler:"gc", Platform:"linux/amd64"}
|
||
Kustomize Version: v4.5.7
|
||
Server Version: version.Info{Major:"1", Minor:"25", GitVersion:"v1.25.4+77bec7a", GitCommit:"b6d1f054747e9886f61dd85316deac3415e2726f", GitTreeState:"clean", BuildDate:"2022-12-14T20:18:42Z", GoVersion:"go1.19.4", Compiler:"gc", Platform:"linux/amd64"}
|
||
```
|
||
|
||
|
||
|
||
> SSH Key 생성
|
||
|
||
```bash
|
||
# 본 단계에서 생성한 키를 통해 클러스터를 구성하는 각 노드에 SSH 접속
|
||
[root@bastion ~]# ssh-keygen -t ed25519 -N '' -f ~/.ssh/id_ed25519
|
||
[root@bastion ~]# cat ~/.ssh/id_ed25519.pub
|
||
ssh-ed25519 AAAAC3NzaC1lZDI1NTE5AAAAIE/1mGqV9YCxpJVZZ8heia19twYAIZl6SmMKEzpaVYTH root@bastion.exem.sysdocu.kr
|
||
```
|
||
|
||
|
||
|
||
> OpenShift 설치를 위한 구성 파일(ign) 생성을 위한 디렉토리 생성
|
||
|
||
```bash
|
||
[root@bastion ~]# mkdir installation_directory && cd installation_directory
|
||
```
|
||
|
||
|
||
|
||
> 클러스터 정보를 명시한 yaml 작성
|
||
|
||
```bash
|
||
# https://console.redhat.com/openshift/downloads 접속하여 로그인 후 맨 하단
|
||
# Tokens 하위 탭 Pull secret 탭에서 오른쪽 Copy 클릭 후 메모장 등에 저장
|
||
|
||
[root@bastion ~]# vi install-config.yaml
|
||
|
||
apiVersion: v1
|
||
baseDomain: sysdocu.kr
|
||
compute:
|
||
- hyperthreading: Enabled
|
||
name: worker
|
||
replicas: 0 # (1)
|
||
controlPlane:
|
||
hyperthreading: Enabled
|
||
name: master
|
||
replicas: 3 # (2)
|
||
metadata:
|
||
name: exem
|
||
networking:
|
||
clusterNetwork:
|
||
- cidr: 10.128.0.0/14
|
||
hostPrefix: 23
|
||
networkType: OVNKubernetes # (3)
|
||
serviceNetwork:
|
||
- 172.30.0.0/16
|
||
platform:
|
||
none: {}
|
||
fips: false
|
||
pullSecret: '{"auths": ...}' # (4)
|
||
sshKey: 'ssh-ed25519 AAAA...' # (5)
|
||
|
||
# (1) worker 노드 같은 경우 승인 절차를 거처야 하기 때문에 0 고정 (공식 문서 기준)
|
||
# (2) OpenShift 같은 경우 master node가 최소 3대 필요
|
||
# (3) networkType 같은 경우 OVNKubernetes (default) 와 OpenShift SDN 이 있음
|
||
# (4) Copy 하였던 Token을 입력
|
||
# (5) 'SSH Key 생성' 단계에서 생성한 Key를 입력
|
||
# https://docs.openshift.com/container-platform/4.12/installing/installing_bare_metal/installing-bare-metal.html#installation-bare-metal-config-yaml_installing-bare-metal 에서 보다 상세한 작성 내용 확인 가능
|
||
|
||
[root@bastion ~]# cp -arp install-config.yaml install-config.yaml.bak && cd ..
|
||
# manifest 파일 생성시 위에서 작성한 yaml은 사라짐으로 원본을 백업
|
||
```
|
||
|
||
|
||
|
||
> manifest 파일 생성
|
||
|
||
```bash
|
||
[root@bastion ~]# ./openshift-install create manifests --dir installation_directory/
|
||
WARNING Making control-plane schedulable by setting MastersSchedulable to true for Scheduler cluster settings
|
||
INFO Manifests created in: installation_directory/manifests and installation_directory/openshift
|
||
|
||
[root@bastion ~]# cd installation_directory
|
||
# install-config.yaml.bak , manifests , openshift 확인
|
||
|
||
[root@bastion ~]# sed -i 's/true/false/' manifests/cluster-scheduler-02-config.yml
|
||
# mastersSchedulable의 기본 값이 true인데 이는 master 노드에도 스케쥴링을 하겠다는 의미
|
||
# 권장하는 값은 false 임으로 변경
|
||
|
||
[root@bastion ~]# cd ..
|
||
[root@bastion ~]# ./openshift-install create ignition-configs --dir installation_directory/
|
||
INFO Consuming Openshift Manifests from target directory
|
||
INFO Consuming Master Machines from target directory
|
||
INFO Consuming Worker Machines from target directory
|
||
INFO Consuming OpenShift Install (Manifests) from target directory
|
||
INFO Consuming Common Manifests from target directory
|
||
INFO Ignition-Configs created in: installation_directory and installation_directory/auth
|
||
# CoreOS 구성을 위한 ignition 파일 생성
|
||
```
|
||
|
||
|
||
|
||
> 생성된 ign 파일들을 파일 서버 디렉토리로 복사
|
||
|
||
```bash
|
||
[root@bastion ~]# cd installation_directory
|
||
[root@bastion ~]# cp -arp *.ign /usr/share/nginx/html/files/
|
||
[root@bastion ~]# chmod 644 /usr/share/nginx/html/files/*
|
||
```
|
||
|
||
|
||
|
||
### 5\. Bootstrap 서버 설치 (bastion 서버 + bootstrap 서버)
|
||
|
||
|
||
|
||
> bastion, master, worker ign 검증을 위한 hash 값 파일 생성 (bsation 서버)
|
||
|
||
```bash
|
||
# hash 값이 길어 타이핑이 어려움으로 hash 파일을 만들어서 curl을 통해 사용
|
||
[root@bastion ~]# cd /usr/share/nginx/html/files
|
||
[root@bastion ~]# sha512sum bootstrap.ign |awk {'print $1'} > bootstrap.hash
|
||
[root@bastion ~]# sha512sum master.ign |awk {'print $1'} > master.hash
|
||
[root@bastion ~]# sha512sum worker.ign |awk {'print $1'} > worker.hash
|
||
```
|
||
|
||
|
||
|
||
> bootstrap 서버 설치 (bootstrap 서버)
|
||
|
||
```bash
|
||
# 사전에 미리 RHCOS가 설치된 환경이며, 네트워크 설정을 한 상태로 가정
|
||
# 네트워크 설정시 DNS 같은 경우 bastion 서버로 설정
|
||
# ssh를 통한 접속이 현재까지는 불가능함으로 해당 서버에서 직접 진행
|
||
[core@localhost~]$ hash=`curl http://10.10.43.227:8080/bootstrap.hash`
|
||
[core@localhost~]$ echo $hash
|
||
38a5ba2405bfb3696794a3fa9bd1568e4aa507c0d4c49035a372159e89512ff0cdfcbf8e0b0a56970694cbcd8e3517779ee53958e71f991150c43f229fe6cb72
|
||
[core@localhost~]$ sudo coreos-installer install --copy-network --ignition-url http://10.10.43.227:8080/bootstrap.ign /dev/sda --ignition-hash sha512-${hash}
|
||
# 100% 진행이 끝나고 완료란 메시지가 출력될 경우 reboot 진행
|
||
# 리부팅 후 화면에 아래와 같이 확인이 되면 정상적으로 설치 완료
|
||
# Ignition: ran on 현재시간 UTC (this boot)
|
||
# Ignition: user-provided config was applied
|
||
```
|
||
|
||
|
||
|
||
> 접속 확인 (bastion 서버)
|
||
|
||
```bash
|
||
[root@bastion ~]# ssh core@10.10.43.231
|
||
Red Hat Enterprise Linux CoreOS 412.86.202301061548-0
|
||
Part of OpenShift 4.12, RHCOS is a Kubernetes native operating system
|
||
managed by the Machine Config Operator (`clusteroperator/machine-config`).
|
||
|
||
WARNING: Direct SSH access to machines is not recommended; instead,
|
||
make configuration changes via `machineconfig` objects:
|
||
https://docs.openshift.com/container-platform/4.12/architecture/architecture-rhcos.html
|
||
|
||
---
|
||
Last login: Mon May 8 11:00:48 2023 from 10.10.43.227
|
||
[core@bootstrap ~]$
|
||
# 정상적으로 ssh 접속이 되며 hostname이 역방향에서 지정한 네임으로 설정되었으면 완료
|
||
[core@bootstrap ~]$ sudo ln -sf /usr/share/zoneinfo/Asia/Seoul /etc/localtime
|
||
# 한국 시간대로 적용
|
||
```
|
||
|
||
|
||
|
||
> Kubernetes API 연결 확인 (bastion 서버)
|
||
|
||
```bash
|
||
[root@bastion ~]# ./openshift-install --dir installation_directory wait-for bootstrap-complete --log-level=info
|
||
INFO Waiting up to 20m0s (until 9:17AM) for the Kubernetes API at https://api.exem.sysdocu.kr:6443...
|
||
# 아래의 두줄이 나온다면 정상 / 모든 리소스가 실행되기 까지 시간이 소요됨
|
||
INFO API v1.25.4+77bec7a up
|
||
INFO Waiting up to 30m0s (until 9:36AM) for bootstrapping to complete...
|
||
```
|
||
|
||
|
||
|
||
### 6\. master 서버 설치
|
||
|
||
|
||
|
||
> master 서버 설치 (master 서버)
|
||
|
||
```bash
|
||
# booststrap 서버 설치 방법과 동일
|
||
# 단 bootstrap.hash 와 bootstrap.ign 이 아닌 master.hash 와 master.ign 을 사용
|
||
```
|
||
|
||
|
||
|
||
> 클러스터 구성 확인 (bastion 서버)
|
||
|
||
```bash
|
||
[root@bastion ~]# ./openshift-install --dir installation_directory wait-for bootstrap-complete --log-level=info
|
||
INFO Waiting up to 20m0s (until 2:09PM) for the Kubernetes API at https://api.exem.sysdocu.kr:6443...
|
||
INFO API v1.25.4+77bec7a up
|
||
INFO Waiting up to 30m0s (until 2:19PM) for bootstrapping to complete...
|
||
# 아래 두줄이 나온다면 정상 / 모든 리소스가 실행되기 까지 시간이 상당 소요됨
|
||
# master 서버에서 'watch crictl ps' 를 통해서 정상적으로 생성되는지 구경하면서 시간을 보내자!
|
||
INFO It is now safe to remove the bootstrap resources
|
||
INFO Time elapsed: 00m00s
|
||
```
|
||
|
||
|
||
|
||
> bootstrap 서버 제거 및 bastion 서버에 k8s 계정 설정 (bsation 서버)
|
||
|
||
```bash
|
||
[root@bastion ~]# sed -i '/bootstrap/s/^/#/' /etc/haproxy/haproxy.cfg
|
||
[root@bastion ~]# systemctl restart haproxy
|
||
# 마스터 3대의 구성이 끝나서 위 두줄을 확인하였다면 더 이상 bootstrap 서버는 사용하지 않음
|
||
# 제거를 하도록 함 (전원을 끄거나, vm일 경우 삭제를 하거나 상황에 따라 자유롭게 진행)
|
||
|
||
[root@bastion ~]# echo "export KUBECONFIG=installation_directory/auth/kubeconfig" >> ~/.bash_profile
|
||
[root@bastion ~]# export KUBECONFIG=installation_directory/auth/kubeconfig
|
||
[root@bastion ~]# oc whoami
|
||
system:admin
|
||
[root@bastion ~]# oc get nodes
|
||
NAME STATUS ROLES AGE VERSION
|
||
master01.exem.sysdocu.kr Ready control-plane,master 0d00h v1.25.4+77bec7a
|
||
master02.exem.sysdocu.kr Ready control-plane,master 0d00h v1.25.4+77bec7a
|
||
master03.exem.sysdocu.kr Ready control-plane,master 0d00h v1.25.4+77bec7a
|
||
```
|
||
|
||
|
||
|
||
### 7\. worker 서버 설치
|
||
|
||
|
||
|
||
> worker 서버 설치 (worker 서버)
|
||
|
||
```bash
|
||
# booststrap 서버 설치 방법과 동일
|
||
# 단 bootstrap.hash 와 bootstrap.ign 이 아닌 worker.hash 와 worker.ign 을 사용
|
||
```
|
||
|
||
|
||
|
||
> worker 노드 승인 (bastion 서버)
|
||
|
||
```bash
|
||
# worker 노드는 master 노드와 달리 수동 승인이 필요
|
||
# 모든 worker 노드 재기동이 완료 되면 진행
|
||
[root@bastion ~]# oc get csr |grep Pending |grep node-bootstrapper
|
||
csr-c4zbq 9m10s kubernetes.io/kube-apiserver-client-kubelet system:serviceaccount:openshift-machine-config-operator:node-bootstrapper <none> Pending
|
||
csr-j29kg 13m kubernetes.io/kube-apiserver-client-kubelet system:serviceaccount:openshift-machine-config-operator:node-bootstrapper <none> Pending
|
||
|
||
[root@bastion ~]# oc adm certificate approve [csr이름]
|
||
# 위와 같이 하나씩 각각 승인 혹은 아래와 같이 한번에 일괄 승인
|
||
[root@bastion ~]# oc get csr -o go-template='{{range .items}}{{if not .status}}{{.metadata.name}}{{"\n"}}{{end}}{{end}}' | xargs --no-run-if-empty oc adm certificate approve
|
||
|
||
# 승인 후 worker 노드가 NotReady에서 약간의 시간이 지난 후 Ready로 바뀜
|
||
# 다시 한번 'oc get csr' 커맨드를 통해 Pending 상태의 worker 노드가 생긴걸 확인 후 승인 처리
|
||
```
|
||
|
||
|
||
|
||
> 구성 요소 확인 (bastion 서버)
|
||
|
||
```bash
|
||
# 아래의 커맨드를 통해 모든 구성 요소가 정상적으로 설치가 되었는지 확인
|
||
[root@bastion ~]# oc get clusteroperators # 또는 oc get co
|
||
NAME VERSION AVAILABLE PROGRESSING DEGRADED SINCE MESSAGE
|
||
authentication 4.12.0 True False False 3d19h
|
||
baremetal 4.12.0 True False False 3d19h
|
||
cloud-controller-manager 4.12.0 True False False 3d20h
|
||
cloud-credential 4.12.0 True False False 3d20h
|
||
cluster-autoscaler 4.12.0 True False False 3d19h
|
||
config-operator 4.12.0 True False False 3d19h
|
||
console 4.12.0 True False False 3d19h
|
||
control-plane-machine-set 4.12.0 True False False 3d19h
|
||
csi-snapshot-controller 4.12.0 True False False 3d19h
|
||
dns 4.12.0 True False False 3d19h
|
||
etcd 4.12.0 True False False 3d19h
|
||
image-registry 4.12.0 True False False 3d19h
|
||
ingress 4.12.0 True False False 3d19h
|
||
insights 4.12.0 False False True 3d17h Unable to report: unable to build request to connect to Insights server: Post "https://console.redhat.com/api/ingress/v1/upload": x509: certificate is valid for *.apps.exem.sysdocu.kr, not console.redhat.com
|
||
kube-apiserver 4.12.0 True False False 3d19h
|
||
kube-controller-manager 4.12.0 True False False 3d19h
|
||
kube-scheduler 4.12.0 True False False 3d19h
|
||
kube-storage-version-migrator 4.12.0 True False False 3d19h
|
||
machine-api 4.12.0 True False False 3d19h
|
||
machine-approver 4.12.0 True False False 3d19h
|
||
machine-config 4.12.0 True False False 3d19h
|
||
marketplace 4.12.0 True False False 3d19h
|
||
monitoring 4.12.0 True False False 3d19h
|
||
network 4.12.0 True False False 3d19h
|
||
node-tuning 4.12.0 True False False 3d19h
|
||
openshift-apiserver 4.12.0 True False False 3d19h
|
||
openshift-controller-manager 4.12.0 True False False 3d19h
|
||
openshift-samples 4.12.0 True False False 3d19h
|
||
operator-lifecycle-manager 4.12.0 True False False 3d19h
|
||
operator-lifecycle-manager-catalog 4.12.0 True False False 3d19h
|
||
operator-lifecycle-manager-packageserver 4.12.0 True False False 3d19h
|
||
service-ca 4.12.0 True False False 3d19h
|
||
storage 4.12.0 True False False 3d19h
|
||
|
||
# 위 내용 처럼 insights 요소가 False일 수 있는데 사설 인증서 문제이며, 해당 요소는 openshift 운영중 발생하는 오류나 버그를 redhat에게 전송하기 위한 요소로 무시하여도 무관
|
||
# 각 요소들이 설치되는 시간이 필요하여 False라 하여도 시간이 지나면 True로 변경 됨
|
||
```
|
||
|
||
|
||
|
||
> 접속 정보 확인 (bastion 서버)
|
||
|
||
```bash
|
||
[root@bastion ~]# ./openshift-install --dir installation_directory/ wait-for install-complete
|
||
INFO Waiting up to 40m0s (until 4:28PM) for the cluster at https://api.az1.sysdocu.kr:6443 to initialize...
|
||
INFO Checking to see if there is a route at openshift-console/console...
|
||
INFO Install complete!
|
||
INFO To access the cluster as the system:admin user when using 'oc', run 'export KUBECONFIG=/root/installation_directory/auth/kubeconfig'
|
||
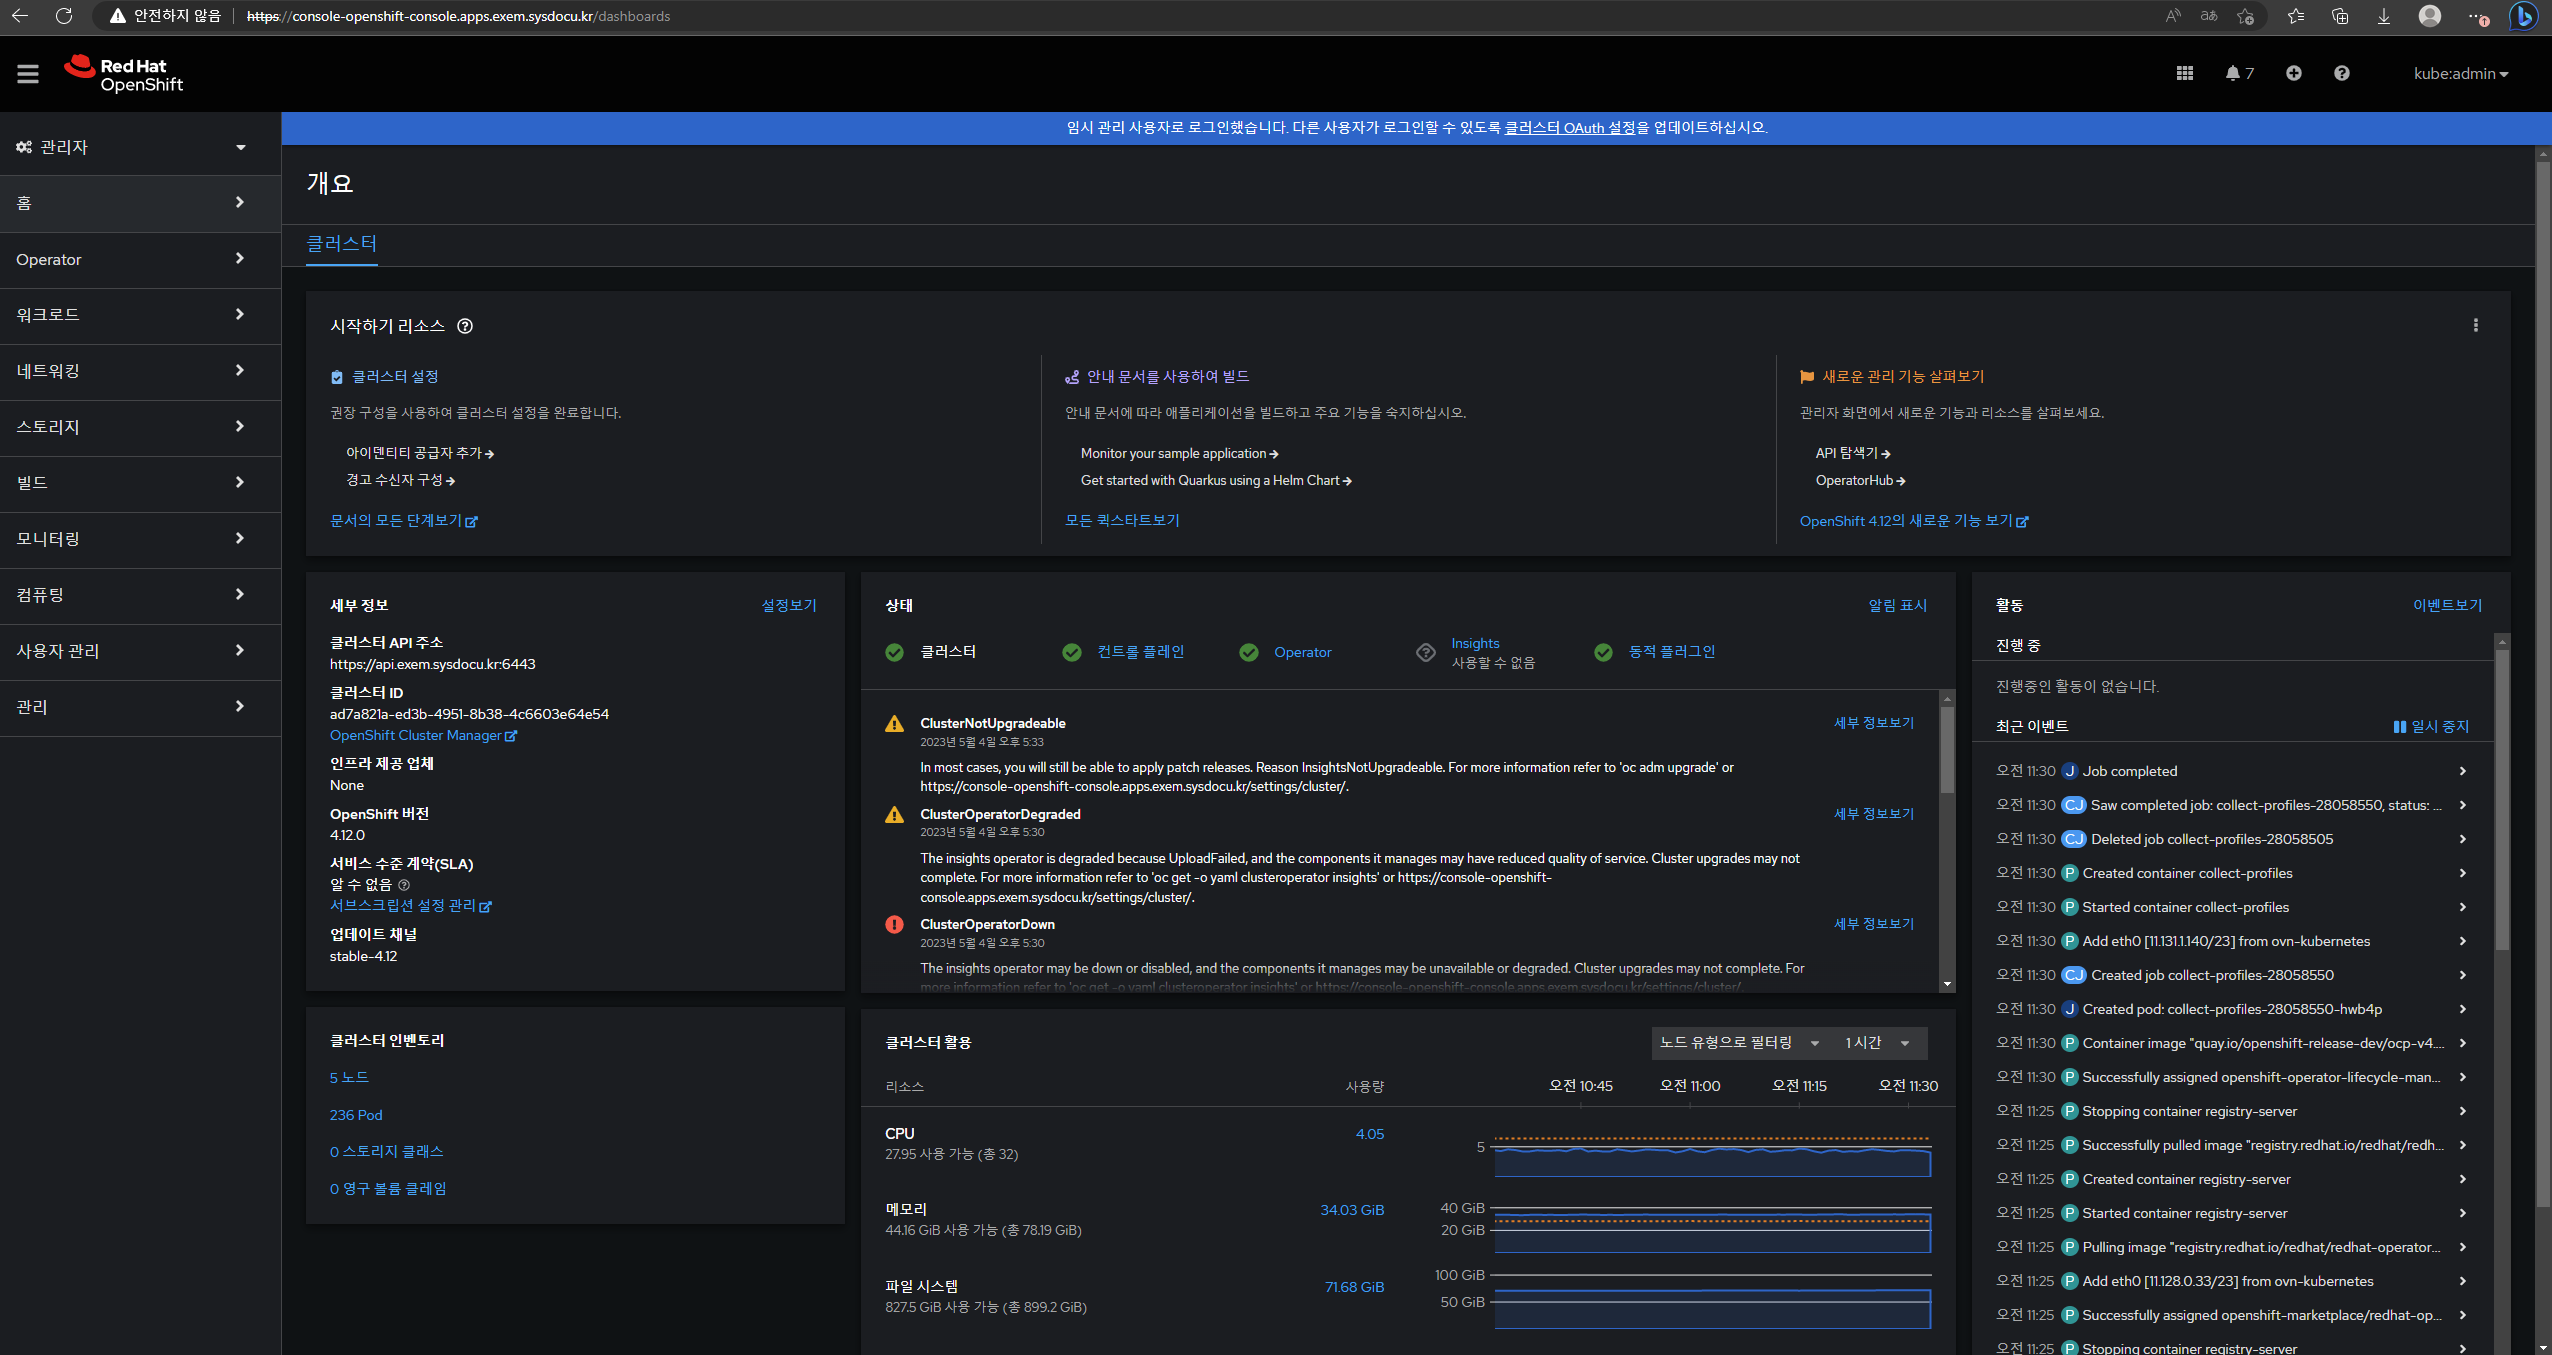
INFO Access the OpenShift web-console here: https://console-openshift-console.apps.exem.sysdocu.kr
|
||
INFO Login to the console with user: "kubeadmin", and password: "QJCU6-DrPZm-X9UiH-T2CDs"
|
||
INFO Time elapsed: 0s
|
||
|
||
# 모든 구성 요소가 정상적으로 True로 배포될 경우 위 커맨드를 통해 확인할 수 있음
|
||
# 단 insights 요소가 False일 경우 이 방법으로는 확인 불가능 아래의 방법 사용
|
||
|
||
[root@bastion ~]# oc whoami --show-console
|
||
# 콘솔 주소 확인
|
||
|
||
[root@bastion ~]# cat installation_directory/auth/kubeadmin-password
|
||
# 패스워드 확인 / 아이디는 'kubeadmin' 고정
|
||
```
|
||
|
||
|
||
|
||
|